INSTA BEAUTY // FAVORITE FAST WORKING PRODUCTS

We live in a world of instant gratification

- and the beauty world is no exception. We want quick results otherwise we lose interest too quickly. After all, spending your hard-earned money on a product that takes months to work, or never works at all, can be extremely frustrating!

Today I am rounding up some of my

favorite insta-beauty products

, the ones that pack a punch in a short amount of time.  Take a look at the

video

below and check the links to shop.

Products mentioned:

Do you have any insta-fix products I should try? Let me know if the comments below, xo

Follow on Bloglovin

!function(d,s,id){var e, p = /^http:/.test(d.location) ? 'http' : 'https';if(!d.getElementById(id)) {e = d.createElement(s);e.id = id;e.src = p + '://' + 'widgets.rewardstyle.com' + '/js/shopthepost.js';d.body.appendChild(e);}if(typeof window.__stp === 'object') if(d.readyState === 'complete') {window.__stp.init();}}(document, 'script', 'shopthepost-script');

JavaScript is currently disabled in this browser. Reactivate it to view this content.

REAL WOMEN MINI MAKEOVERS

The best part of my job is helping women to look and feel their best. I get to see transformations happen every day at the salon- and I often feel so blessed to be a part of changing the confidence of women for the better. We all deserve to feel great!

This week on my Studio5 TV segment I had the opportunity to pick 4 real life viewers of the show, to come in studio and get a mini-makeover with yours truly. We had hundreds of entrants, and narrowing it down was no easy task. The four women I chose all had different needs and starting points with their makeup routines, it was so much fun to give them all a few new tools and tips to try at home.

Take a look at their results in the

video

below

Products Used:

Hope you'll try some of these simple updates, and let me know how it goes! xo

Follow on Bloglovin

!function(d,s,id){var e, p = /^http:/.test(d.location) ? 'http' : 'https';if(!d.getElementById(id)) {e = d.createElement(s);e.id = id;e.src = p + '://' + 'widgets.rewardstyle.com' + '/js/shopthepost.js';d.body.appendChild(e);}if(typeof window.__stp === 'object') if(d.readyState === 'complete') {window.__stp.init();}}(document, 'script', 'shopthepost-script');

JavaScript is currently disabled in this browser. Reactivate it to view this content.

DIY EYEBROW TINTING // IT'S EASIER THAN YOU THINK!

Eyebrows have really taken center stage in the beauty world over the last few years. And I for one have LOVED seeing them become such a huge piece of the puzzle... after all they are literally the 'frame' around the 'window to your soul'! That's a bold statement- but hey, it's true!

I first began tinting my eyebrows during my time in beauty school, and I realized what a life changing experience it can be, especially for fellow blondies like myself. And while a professional tint and wax is always a great way to liven up your features- it's not always in the cards to pay to have that service done at the salon.

Dying your eyebrows at home is easier than you might think, and this post will teach you exactly what to do to get a professional look in under 10 minutes. [Video]

DIY Brow Tinting

  • Use a store bought Root Touch Up Kit by Clairol, and opt for an Ash tone which will appear more natural. 6A is ideal for blonde brows, 5A is great for medium brown, and 4A is best for very dark brown or black. Typically I recommend a 5 minute process time for the Clairol, but start with 3 minutes to determine how dark you want your final results.

  • If you've got very corse brow hairs, or grey in your brows try Just for Men Mustache and Beard Tint and process for about 3 minutes. The Light-Medium, Medium Brown, and Medium-Dark Brown will be the best colors to use on brows.

  • Opt for a color that is AT MOST 2 shades darker than your natural brows

  • Mix the color following the ratio described in the directions which is 1:1 parts color to developer, but remember you'll only need a small amount, about the size of a pea for each part.

  • Apply a layer of Vaseline around the brows first to protect the skin from the dye using a Q-tip.

  • Use a cheap makeup brush to apply the color to the hairs in light upward strokes. Avoid pressing firmly onto the skin... we are tinting the HAIRS, not the skin.

  • Remove any stray dye from the skin with a clean Q-tip.

  • Time for 3-5 minutes, and wipe off using a warm washcloth and shampoo, or a makeup remover wipe. If you applied the right brow first, remove the right brow first as well.

  • Assess the color and repeat to darken the color if necessary.

Typically I recommend tinting every 4 weeks to maintain your color, and one box of dye should last you 8-10 applications. I hope you'll give it a try, let me know if you have any questions below! xo

Disable your ad blocking software to view this content.

THE ULTIMATE LASH CURL GUIDE

One question I get asked a lot is, 'How do I curl stubborn lashes?’

Many women struggle to get their lashes to hold curl, and I feel your pain. My lashes are pretty much stick straight, but I have developed a 3-clamp technique that makes the world of difference. I hope you'll try it, and let me know what you think.

3 Clamp Technique for the Ultimate Lash Curl

  • 1- Clamp the lash curler at the base of the lashes as close to the skin is possible without pinching the skin. The angle of the lash curler should be parallel to the face, resting on the cheekbone.

  • 2- Slide the curler up the length of the lash, stopping half way- right in the middle of your lashes. Raise the angle of the curler about 30 degrees, so that the curler is sticking straight out from your cheekbone.

  • 3- Slide the curler out again to the tips of the lashes and clamp one final time, while the angle of the curler is raised 45 degrees, sticking straight out from the eye socket.

My favorite lash curler? This one here.

Thanks for reading, I would love it if you would share this post with anyone else who might struggle with their lashes too. xo

Follow on Bloglovin

JavaScript is currently disabled in this browser. Reactivate it to view this content.

GIZMO SNOOP: SIGMA SPA BRUSH CLEANSING GLOVE

Cleansing your makeup brushes is a crucial

step that can often be forgotten or postponed too long. Skipping this vital step will not only cause your brushes to not last as long, but it will also prevent the best application of the products themselves. Not to mention the bacteria growth and possible skin irritations and acne that comes from smearing said bacteria all over your face. #AmIRight?

I've posted about

my favorite way to clean my brushes before

, but today I'm snooping out a fun new tool to aid in the process even further.

Sigma Beauty

makes these unique

cleansing gloves and sink mats

, that protect your hands from taking a beating while scrubbing, and they also help to get the job done quicker and more efficiently.

You should be cleaning your liquid/cream 

brushes every 2-3 weeks, and your powder brushes every 6-8 weeks. 

The gloves and mats are made from a high quality silicone that have many different textures built in.

The textured bits are designed to loosen dirt and makeup from your brushes

and then to help reshape the brush before it dries.

I love using this, and it really does make the job quicker and more fun, while saving my hands from getting to raw and dry. I have the

Express Glove

which works great but sometimes can be hard to get a handle on once things get slippery. Next time I buy,  I'll go for the

sink mat

which has suction cups and requires no hands at all!

So if you want to take better care of your brushes, I highly reccomend this gizmo! Thanks for reading, xo

Follow on Bloglovin

!function(d,s,id){var e, p = /^http:/.test(d.location) ? 'http' : 'https';if(!d.getElementById(id)) {e = d.createElement(s);e.id = id;e.src = p + '://' + 'widgets.rewardstyle.com' + '/js/shopthepost.js';d.body.appendChild(e);}if(typeof window.__stp === 'object') if(d.readyState === 'complete') {window.__stp.init();}}(document, 'script', 'shopthepost-script');

JavaScript is currently disabled in this browser. Reactivate it to view this content.

THE STOCKING STUFFER I CAN'T STOP LOVING

This year I got a stocking stuffer that I have been loving so much I wanted to quickly share with you what it is. I've talked about my chronic underarm sweating in the

past on this blog

[sexy, I know] but I've never tried a

Dry Spray Antiperspirant

before, until now.

Santa gave me a bottle of the

Dove Dry Spray

- and I am so happy with it. It's an aerosol spray that goes on clear and dries super quickly. I have the Cool Cucumber scent which is light and fresh, but there are a few other scents I am excited to try as well.

It's a 48 hour antiperspirant, but I still apply it everyday in the AM since I need a little more help. My favorite part of this dry spray is that it is super conditioning and moisturizing, and feels really nice on the skin after shaving. And because it is clear if doesn't leave any markings on your clothes! Can I get a 'hallelujah' for that please!? I feel like this is a must have when wearing your dry-clean only clothes, because removing white marks is never easy on nicer fabrics. It keeps me just as dry as my regular cream deodorants, but without the waiting time after application, and without those weird clumps of product left on my skin... you know what I'm talking about.

After doing a little research I noticed that many brands are now creating Dry Spray options- so I am thinking that this will be the new wave of under arm care that will become super popular. So far I've seen Axe, Degree, and Dove all offer a Dry Spray option, and you can pick those all up at any

Kroger

store for around $6.

Let me know in the comments below if you've tried a Dry Spray yet- and what are your thoughts?

Follow on Bloglovin

*post sponsored by Lunchbox. opinions are always 100% my own

SNEAKY WAYS I USE MY FAVORITE LOTION

Well peeps, I realized that I had not one, but three different varieties of the Cocoa Radiant Vaseline in my medicine cabinet. Obviously I am a believer! I use them in their normal functions to hydrate the skin, but I also use them for other unique ways too.

Now that it's colder, I always amp up my moisturizing routine- the Cocoa formula is always the one I reach for because I LOVE THE SCENT. It's warm and rich, with a hint of yummy. And it has prescriptions strength ingredients, without the prescription. Here's how I use them:

Intensive Care Lotion

: This guy is a staple for my kids' skin. It is always what we use post-bath, because the scent is wonderful- but it is also rich and hydrating on their sensitive skin.

  • SNEAKY TECHNIQUE: I use this lotion as a Barrier Cream when applying my faux tanner as well. I works so great to protect your palms and the bottom of your feet from getting tanner on them, and then leaves them silky afterward.

Spray & Go

: I have talked about my obsession with the Spray & Go Moisturizers on this blog a few times [here & here if you want to see me gush] I use it daily for quick application of moisture on my legs and arms.

  • SNEAKY TECHNIQUE: Use it to hydrate knees, elbows, and feet prior to applying your tanning lotion or mousse. It is light weight so it won't interfere with the saturation of your tan, but it will also help to protect over-saturation and dark spots on these drier thicker areas of skin. [here are my rules for the perfect faux tan]

Petroleum Jelly

: This stuff is crucial in my household during the cold and flu season. When my kids have a runny nose, they always get sore, raw skin on their upper lip from blowing. I apply the Vaseline to the area to calm and protect the skin. The Cocoa scent is ideal because it smells nice when applied right under your nose.

  • SNEAKY TECHNIQUE: I use Vaseline as eye makeup remover, and have for years! A tub lasts forever and it works so good removing stubborn mascara and liner. Plus it leaves the skin around your eye plump and hydrated, just avoid direct contact with the eyes of course.

What ways do you use your Vaseline? Be sure you scoop up some of this goodness next time you are at Target, talk to you soon, xo

Follow on Bloglovin

!function(d,s,id){var e, p = /^http:/.test(d.location) ? 'http' : 'https';if(!d.getElementById(id)) {e = d.createElement(s);e.id = id;e.src = p + '://' + 'widgets.rewardstyle.com' + '/js/shopthepost.js';d.body.appendChild(e);}if(typeof window.__stp === 'object') if(d.readyState === 'complete') {window.__stp.init();}}(document, 'script', 'shopthepost-script');

JavaScript is currently disabled in this browser. Reactivate it to view this content.

*post sponsored by Lunchbox, all opinions are my own

3 MINUTE BOLD & NATURAL BROWS

Anastasia Brow Tutorial, Natural Brows, Eyebrow How-To, Ulta Beauty

If you have been living under a rock the last year, you may have missed the memo; but BOLD brows have taken over the world once

instagram

photo at a time! It really has been a big shift in the world of beauty, and I for one hope the trend never leaves.

Bold brows make you look younger

and they single handedly take your look from 'eh' to 'POW' in less than 3 minutes. [If you are looking for speed stick with powder... pencil requires more time]

I have softened my brows up over the last few months however, and am not drawing them as heavy as I did when this trend first emerged. I feel like that is often the case for trends... we go BIG at first, then start to see the light and pull it back slightly over time. [contouring... I am talking to you! Can I get an Amen!?]

So here is a really quick and

easy tutorial

on achieving

natural bold brows

with Ulta Beauty

.

Products used [all available at Ulta Beauty]:

Follow on Bloglovin

!function(d,s,id){var e, p = /^http:/.test(d.location) ? 'http' : 'https';if(!d.getElementById(id)) {e = d.createElement(s);e.id = id;e.src = p + '://' + 'widgets.rewardstyle.com' + '/js/shopthepost.js';d.body.appendChild(e);}if(typeof window.__stp === 'object') if(d.readyState === 'complete') {window.__stp.init();}}(document, 'script', 'shopthepost-script');

JavaScript is currently disabled in this browser. Reactivate it to view this content.

*this post was created in collaboration with StyleHunters and Ulta Beauty

HOW I ORGANIZE MY MASSIVE MAKEUP MESS

I get asked a LOT about

storing my makeup collection

... seeing as I am a beauty blogger and pro hair stylist, people are always intrigued with how I manage my ever growing product situation. And let me tell you- it's not all butterflies and rainbows when your house is taken over by makeup! My poor husband handles it like a champ though.

My recommendation for storing makeup is to go with

acrylic organizers

. They are the most beautiful to look at, and they generally have the proper sized compartments that keep makeup in its' place more effectively than just stuffing everything into a drawer.

I also firmly believe that

you actually USE what you can see & access easiest

. So I prefer to keep my 'regular-rotation' items on the countertop, and keep my special occasion items put away in the drawers.

Yesterday I posted this pic on instagram showing you how insane my bathroom can get when I am not using my organizers. :/ whoops...

But, you can also see what my collection looks like when I've tidied up and have things in their proper place in the pic below. Much better! Plus I can find things easier and actually use my counter space!

My organizers are from the Container Store, and I really love them...

Here are a few great highly rated options for you.

The more expensive organizers are all considerably larger, and use a thicker, stronger acrylic. And every now and then you can find nice discount options at places like TJMaxx too

Do you have any tips for keeping your collection at bay? Let me know, and thanks for stopping by today! xo

!function(d,s,id){var e, p = /^http:/.test(d.location) ? 'http' : 'https';if(!d.getElementById(id)) {e = d.createElement(s);e.id = id;e.src = p + '://' + 'widgets.rewardstyle.com' + '/js/shopthepost.js';d.body.appendChild(e);}if(typeof window.__stp === 'object') if(d.readyState === 'complete') {window.__stp.init();}}(document, 'script', 'shopthepost-script');

JavaScript is currently disabled in this browser. Reactivate it to view this content.

7 WAYS TO SHOP SMART AT SEPHORA... HOW TO COPE WITH THE OVERWHELM & NAVIGATE LIKE A ROCKSTAR

Inside tricks to shop Sephora and other beauty stores successfully

One of the most common things I hear from women when the subject of beauty comes up in our conversations, is that they often feel overwhelmed by shopping for new makeup and hair products.

And because of that lack of confidence, many women avoid the experience all together- which means they aren't having fun with the their beauty routine [which is SO important] and they may be using old expired products!

To help you feel excited about the shopping experience again, today I am sharing my best tips for buying smart next time you are at Sephora. But these tips can also apply to other retailers and shopping online as well! Ready? Go...

1- Go with a goal in mind- what types of items do you NEED

  • Walking in just to browse is certainly ok, but when it comes time to throw down your hard-earned cash, don't do it without asking yourself this question: 'Does my makeup collection NEED another product like this one?' If you NEED new foundation, start there first... then wander over to the mascara if you have the time later.

2- Stick to a healthy timeframe

  • I personally believe 30 minutes is enough time to get what you NEED, and also explore the store for a look at new items. Beyond that and everything can start to all 'blur' together, and you may end up feeling overwhelmed again anyway. You also may end up with more in your shopping cart the longer you are there- so keep it short and leave feeling excited and refreshed, not depressed that you just spent your rent money.

3- Read the signage... it is your road map

  • Many times our eyes are so fixated on the colors and displays, that we forget to look up and read the signage near the products. Sephora does a great job at labeling the brands themselves, but also explaining what products are for and how they work. You can avoid time wasting by reading ahead and knowing if that type of product will be right for you. Look for key words like 'shimmer' 'matte finish' 'full coverage' etc to guide your decisions.

4- Enroll the help of an employee

  • If you've ever worked in retail, you know that the days can go by SO SLOW! Most employees are happy and excited to help their customers because it is their job after all, and it helps keep them busy. The employees know the layout of the store, they are trained in the products, and they are best equipped to help you find what you need. Don't be afraid to ask- but that being said, don't feel pressure to buy anything you don't really NEED. The employees get paid no matter what, so say 'no thank you' when necessary!

5- Scout out the endcaps and floating displays

  • The ends of the isles are treasures amongst the store- don't ignore them! This is where you'll find NEW release products, best-sellers, and pre-packed collections that offer the highest value!

6- Testers and samples are your friend

  • The great thing about stores like Sephora is that they offer testers of almost every product in the store, and they'll make a sample of anything you may need to try at home before buying- like foundation. Get your hands messy and test out those colors and textures before you buy. A while back I posted this pic on instagram of my 2-year-old swatching lipgloss at Sephora. She's seen me do it a million times- so she just does it too! But you should as well. Also Try something from a brand you've heard of or used before, but also try a similar product from a line you're unfamiliar with. Compare the two and pick your fav! You'll never find new loves, if you always buy from the same line simply because you know the name.

7- Edit 

  • Now that your basket is full- it's time to reign it in and edit out about 20%. Really take a long look at what you're considering and decide if it again meets the NEED criteria, and if you are filling a hole in your collection. If you can walk away without thinking about it again- you made the right decision to give it the boot.

Bonus- Be careful of the cashwrap trap!

  • Sephora does an amazing job of giving you things to look at while waiting in line... but be careful! Just 'throwing in' a few extra trial sizes at the end of your trip, just undid your entire editing process, and I guarantee you didn't NEED anything you threw in. The only time it is safe to shop here, is only when you want to check for a smaller size version of a product you are already purchasing.

Hope that helps, and happy shopping! A few of my Sephora faves are below

10 ECO-FRIENDLY BEAUTY PRODUCTS THAT GIVE AMAZING RESULTS

Organic Makeup and Skin Care, Eczema Relief, Bacne Products, Earth Day, Top Rated Organic and Eco Friendly Makeup and Skincare

Happy Earth Day!

Whether you are a newbie to the Green lifestyle, or you've been practicing earth friendly behaviors for year, everyone can appreciate a product or brand that makes eco-conscious choices. While only 5-10 years ago, it was very hard to find

health and beauty products that were organic or sustainable

, but today there are so many incredible options available to us that utilize best practices and make amazing products to boot! 

I've personally used all of these products and not only do they perform amazingly, but they share the common factor of being

eco-friendly both in packaging and ingredients

. Support these brands so that they continue to raise the bar and produce products that are safe and effective. Ready? Here goes:

  • 1- Kevin Murphy Smooth Again Leave-In Hair Smoothing Treatment- I am so proud to sell Kevin Murphy in my salon. Not only because the products are amazing, but the brand actively promotes and utilizes eco-friendly practices. This smoothing cream is to die for, and I literally use it on EVERY SINGLE client that sits in my chair, no matter what hair type they have.

  • 2- SheaMoisture Duel Sided Makeup Brush Set These are soft, fluffy and so wonderfully made. The duel ends cut down on materials needed, but on top of that the handles are made from bamboo and recycled aluminum.

  • 3- Yes To Tomatoes Activated Charcoal Bar Soap If you are an oily skin person, or suffer from bacne (back acne) or acne on your arms... look no further than this amazing bar of charcoal goodness!

  • 4- One Love Organics Brand New Day MicroDerm Scrub From one of my fav organic lines comes this amazing scrub & masque that cleanses, exfoliants, and detoxifies your skin with gentle love. Oooh it's so good!

  • 5- Yes To Coconut Eczema Relief Spray Anyone who deals with ECZEMA knows that some products can irritate more than help. This lightweight spray is super soothing and helps with itch and redness. Plus it smells like heaven and is totally affordable.

  • 6- Lavanila The Healthy Deodorant Finding a deodorant without harsh chemicals in it- is nearly impossible! But these healthy deodorizers not only smell amazing (I love the coconut scent) but they sooth the underarms too.

  • 7- Josie Maran Creamy Concealer Stick Josie's entire line is made from natural and sustainable ingredients, and one of her main purposes for creating the line was to bring glamorous skincare and makeup into an eco-friendly realm. This creamy concealer crayon has been a fav of mine for years. It is wonderful at concealing under the eye circles and fine lines while giving a moisture that can only come from Argan Oil.

  • 8- Method Foaming HandWash My go to makeup brush cleanser every time! Although I do try different scents almost every time I purchase. And of course it's a great hand soap as well!

  • 9- Pacifia Lip Tint These lip tints go on like chapstick but have beautiful subtle tints that are perfect for natural gals on the go.

  • 10- John Masters Organics- Rose and Apricot Day Cream A lightweight yet hydrating face moisturizer that smells like a fresh garden. I almost want to eat it... and probably could because John Masters uses all organic ingredients and limits their preservatives as well.

What are your favorite eco-conscious beauty products? Let me know in the comments below, and go plant a tree today! xo

Follow on Bloglovin

!function(d,s,id){var e, p = /^http:/.test(d.location) ? 'http' : 'https';if(!d.getElementById(id)) {e = d.createElement(s);e.id = id;e.src = p + '://' + 'widgets.rewardstyle.com' + '/js/shopthepost.js';d.body.appendChild(e);}if(typeof window.__stp === 'object') if(d.readyState === 'complete') {window.__stp.init();}}(document, 'script', 'shopthepost-script');

JavaScript is currently disabled in this browser. Reactivate it to view this content.

5 [EMBARRASSING] MAKEUP MISTAKES YOU DON'T KNOW YOU ARE MAKING

makeup mistakes, makeup blunders, avoid these makeup mistakes

Every time I switch up my hair color (which is a lot, in my case) I like to reevaluate the makeup that I pair with

said

new hair color. It is a great excuse to clean out my collection and update expired products etc. If you don't change you hair color as often as I do- then the beginning of each new season is a great time to do this as well.

During my last makeup update- I realized that I had made some pretty

bad makeup mistakes

in the past... which made me laugh, but also made me think that there are probably lots of women who make these mistakes too. Today's post will hopefully help you avoid those mistakes and leave you feeling beautifully confident!

5 [EMBARRASSING] MAKEUP MISTAKES YOU DON'T 

KNOW YOU ARE MAKING

1- YOU DON'T CHECK YOUR REFLECTION IN NATURAL OUTDOOR LIGHT PRIOR TO LEAVING THE HOUSE

  • This exercise alone will make the world of difference for so many women. Indoor lighting speaks LIES to all of us! Taking the time to look in the mirror while standing in front of a window will reveal uneven or blotchy makeup, the wrong color of foundation, too much blush or bronzer... and the list goes on. Don't skip this important step- And all of the below mistakes can be caught, by following this step alone.

2- YOU DON'T REMOVE EXCESS MAKEUP FROM YOUR HAIRLINE AND BROWS

  • A huge pet peeve of mine, and a mistake that I made for years before I realized! The fine hairs located in the hair line and just above the eyebrows or just in front of your ears (often referred to as peach fuzz or baby hair) are like magnets for foundation and powder. In the right lighting those hairs are now 'skin-colored', which is a dead giveaway that you are sporting [too much] makeup. Simply take a dry tissue and sweep it along the baby hair after you've finish your makeup and remove any excess that is sitting on the hairs.

3- YOU DON'T REMOVE EXCESS MAKEUP FROM YOUR INNER EYE AND LOWER LASH LINE

  • Along the same lines as above, using a cotton swab to remove excess makeup from your tear duct the inner rim of your eyes in a crucial step to making your look appear natural. The skin around your eyes is meant to be colored differently than the rest of your face, and when it is all the same tone, you are on a bullet train to 'over-done' land. Blend and transition... it's the name of the game! Make it easy with the one and only Beauty Blender.

4- YOU DON'T BLEND YOUR MAKEUP AROUND THE SIDES OF YOUR NECK

  • Holy crap- this again is another mistake that I used to make, and I see a lot while out in public. One time I saw a pic of me from the side, and I had a very clear 'line' that showed where I stopped blending my makeup on my neck. My chest and front of my neck looked great, but I forgot to blend and transition my bronzer around the sides of my neck. whoops! This is especially important when you are wearing your hair up and your neck is exposed.

5- YOU DON'T SET WITH TRANSLUCENT POWDER TO AVOID MAKEUP TRANSFER TO YOUR COLLARS OR NECKLINES

  • There is nothing less sexy than having makeup all over your collar. It happens to the best of us, but can be avoided if you either skip neck and chest makeup on collar-wearing days, or at the very least; set your makeup with a translucent powder to add a buffer and protect you clothing. I love this splurge or this save option. And this super save option too! Also placing a hand towel over your face, then sliding your top on over that, is a great way to avoid transfer.

I hope these tips help you to look and feel more gorgeous! Any other mistakes that you would add to this list? Let me know in the comments below- and come say hi over on

instagram

.

Follow on Bloglovin

!function(d,s,id){var e, p = /^http:/.test(d.location) ? 'http' : 'https';if(!d.getElementById(id)) {e = d.createElement(s);e.id = id;e.src = p + '://' + 'widgets.rewardstyle.com' + '/js/shopthepost.js';d.body.appendChild(e);}if(typeof window.__stp === 'object') if(d.readyState === 'complete') {window.__stp.init();}}(document, 'script', 'shopthepost-script');

JavaScript is currently disabled in this browser. Reactivate it to view this content.

SECRETS TO DEWEY SKIN IN THE DEAD OF WINTER

Skincare and makeup products to achieve a dewey complexion. At home facial routine, DIY facial, skincare, glowing skin, dewey skincare, makeup that glows

Well folks, we've hit the most drab time of year- and our skin tends to follow suit looking drab and dull right along side the weather outside.

Dull, dry and lackluster

are not words that anyone wants associated with their skin or face, but during these cold winter months it seems almost impossible to avoid the seasonal slump that plagues our complexions.

Today I am giving you my secret recipe for

Dewey Skin even in the Dead of Winter,

and you might be surprised at how easy it really is. You can catch the full scoop on Studio5 TV and get my

5 steps to glowing skin

down below.

1- Take your kitchen 

Crock Pot

 and turn it into a luxury spa service by heating up a few moistened

wash cloths

(add a few drops of essential oils for added relaxation) for about 20 minutes on low heat. Next remove a towel and place it over the face and press gently to allow the

steam

to go to work unclogging pores and cleansing the skin for about 45 seconds until the towel has cooled. Repeat as necessary until makeup and dirt is all removed and skin is squeaky clean.

2- Deeply exfoliate with a

peel

ing

gel like my favorite 

Sonya Dakar Flash Facial

. It removes the surface layer of skin cells in 60 seconds without irritating, stinging or burning- and you're left with a fresh radiant layer or skin that is already glowing! (I do this once a week, but up to 3 times per week is ok in the winter months. Be sure to watch the video to see this in action... it's kind of gross but so cool!)

3-

Repair

lost moisture with a cooling gel like the 

Garnier Moisture Rescue

. It's lightweight and non greasy, but extremely hydrating and leaves the skin glowing and smooth.

4- Complete your dewey complexion with a light

reflect

ive

serum like 

Revlon Skinlights

. It comes in four different tones and is easy to apply as a last step in your makeup routine. Tap the product onto the tops of your cheekbones and around towards your temples for a subtle reflective glow.

5-

Illuminate

the dark circles under your eyes with the 

SmashBox Under Eye BB Cream

. This step rehydrates fine lines and brightens all at once giving you a Summer time glow even when temperatures are plummeting outside.

Cheers to Dewey Skin, xo

Follow on Bloglovin

!function(d,s,id){var e, p = /^http:/.test(d.location) ? 'http' : 'https';if(!d.getElementById(id)) {e = d.createElement(s);e.id = id;e.src = p + '://' + 'widgets.rewardstyle.com' + '/js/shopthepost.js';d.body.appendChild(e);}if(typeof window.__stp === 'object') if(d.readyState === 'complete') {window.__stp.init();}}(document, 'script', 'shopthepost-script');

JavaScript is currently disabled in this browser. Reactivate it to view this content.

THE TOP BEAUTY ARTICLES OF 2014 // WHAT YOU MAY HAVE MISSED

It's hard to believe and a little sad that 2014 is drawing to an end- and yet at the same time I am always so happy for a fresh start on a new year. I was reflecting this last week while I took a short break from the blog, over the amazing year that I have had as a blogger, and what great things happened on these pages, and in real life because of my journey with beauty.

Today I wanted to compile a few of the

Top Beauty Articles 

from this blog in 2014, and share them with you once again. You may have missed a couple, or want to re-read one or two. These are the cream of the crop [if I do say so myself] as well as the posts that had the most views or comments from readers this year. I hope you'll learn something new, and

share

an article with a girlfriend who might learn something too. (shameless plug ;)

Image above is clickable, or links available below:

Follow on Bloglovin

7 WAYS TO USE YOUR BEAUTY BLENDER

a guide to using your beauty blender for maximum results

Every now and then, there is a beauty tool that comes around that changes the landscape of the industry. These rare cult-favorites are usually an investment and it may take some convincing [and/or saving] before you decide to buy. If you are like me, you may have tried some of the other knock-off sponges first in hopes that you would get the same results without the heavy price tag, but alas that didn't work out in your favor. Fast forward to today- I actually own and use FOUR Beauty Blenders currently, because it really is that good and I am totally obsessed. But again, if you are like me, you want to get the most out of your purchase because after all, $20 is $20 and it doesn't grow on trees.

Here are 7 ways to use your beauty blender in your makeup routine:

*Remember your BB should always be pre-moistened with water prior to use. This changes the texture and size of the sponge, but also makes it so your products aren't absorbed into the sponge.

1- Moisturizer or Serum

The BB is ideal for applying your moisture products and the white Pure BB is designed for just that, although any of the sponges work great.

2- Primer

This is one of my favorite uses for the sponge because it presses the primer into the pores and fills them more compactly and evenly then using your finger tips. Use the small end to apply your eye lid primers as well.

3- Foundation (Liquid or Powder) & Setting Powder

The most common use for the BB is to apply foundation, and if you just use it for this one step you'll still feel as though it was worth the purchase! The bouncing action of the sponge distributed your foundation so evenly with out streaking, and mimics the natural texture of your skin. Many people don't know however, that powdered foundations are also applied beautifully with the BB too. Just dip the sponge into the minerals, tap off the excess, and bounce the sponge on the skin to distribute the formula seamlessly. Finish your whole look with a dusting of translucent setting powder too.

4- Contour & Blush (Cream or Powder)

The precision small-sided tip of the sponge is perfect to draw lines of your dark contour colors under the cheekbones, down the sides of the nose, and under the jawline. You'll be able to see exactly where the color is placed and your results will be that much better. Then flip the sponge over, and bounce the rounded side along your contour lines to blend and blur the lines. Ditto for your blush as well.

5- Concealer

Use the BB to blend concealer with minimum effort and maximum comfort. I never worry about tugging on the delicate skin around my eyes with the BB because its' texture is so forgiving. The point of the sponge is great for getting to the inner corners of your eyes, and the small folds around your nose. BB even has a new mini sponge for detailed worked, although I haven't tried it yet.

6- Eye Shadow (Cream or Powder)

You might not think about using the BB for your eye shadow, but I find it is an amazing way to apply your cream shadows and blend out your edges with powdered shadows as well. The pointed tip makes application a breeze, and you can layer and build color beautifully. The mini BB would also be great for this purpose.

7- Lips (Balms or Stains)

When applying your more liquidy lip colors like balms, glosses or stains- the BB is a welcome companion. I love it for adding a hint of tint to the lips without looking too heavy in color. It's also ideal for blending ombre or color fade lipstick looks. Apply your lip liner first, then simply dab the lip color to fill in the lines.

Are there any ways you use your Beauty Blender that I haven't tried? Let me know in the comments below- and if you haven't tried a Beauty Blender yet... I am sure you can see that I highly recommend it!

THE MAGIC MAKEUP BRUSH CLEANSER YOU'VE NEVER HEARD OF

magic makeup brush cleanser, makeup brush cleaning techniques, hot to clean makeup brushes, makeup brush cleaner DIY

Pin Me!

Oh hello friend! You are in for a treat today- I am sharing my

MAGIC technique for cleaning those pesky makeup brushes

. You will never use dish soap or alcohol again, when you see what secret ingredient I discovered that makes makeup JUMP out of your brushes. It's amazing! Check out the quick

video tutorial

below, and let me know what you think.

What you'll need:

Fractionated [liquid] Coconut Oil-

DoTerra

 or

Nature's Way

Liquid Cleanser-

Beauty Blender

or

Method Foaming Hand Wash

Hope you'll try this

new secret method of cleaning makeup brushes

- it really is the most amazing technique, and I'll never go back to anything else. Science rules! xo

Follow on Bloglovin

!function(d,s,id){var e, p = /^http:/.test(d.location) ? 'http' : 'https';if(!d.getElementById(id)) {e = d.createElement(s);e.id = id;e.src = p + '://' + 'widgets.rewardstyle.com' + '/js/shopthepost.js';d.body.appendChild(e);}if(typeof window.__stp === 'object') if(d.readyState === 'complete') {window.__stp.init();}}(document, 'script', 'shopthepost-script');

JavaScript is currently disabled in this browser. Reactivate it to view this content.

MASCARA WANDS 101 // WHAT YOU SHOULD KNOW BEFORE YOUR NEXT PURCHASE

Mascara Wand Shapes, Mascara Wands 101, What are the different shaped mascara wands for?

Find this helpful? Share it on

Pinterest

Ever wondered

what the crap all of those different mascara wands are for? Why are they shaped differently, and what will the results be?

It can be more than a little confusing at times- and really overwhelming when you are strolling down the makeup isle.

Wearing:

Can't Hold Me Down Dress

c/o White Plum

Well, rest easy my friends- today I am putting you through my

Mascara Wands 101

course, and by the end of it you'll be a pro! Here is what you need to know about the different mascara wand types, and don't miss the video from Studio5 TV with more info (available after 2pm MST) and the GIVEAWAY down below. Although there are variations out there that I haven't included, these are the 7 basic types of wands and the rest all fit under one of these categories as well.

Oversized Wand- Maximum VOLUME

These full bristle wands are designed for amplified volume all around. They will thicken the lashes as well as give length and are designed to POP the eye open with their effect. These types of wands are better for advanced makeup junkies who aren't 'flinchy' with eye makeup. If you have small or deep set eyes however, this guy is not the best pick. Try

Maybelline Mega Plush

 or

Too Faced Better than Sex

(dumb name, amazing mascara)

Cone Taper Wand- Winged Out Corners

Cone shapes will help direct the lashes toward the outer corners and accentuate the cat-eye look. The bristles that are longer will distribute more product on the lashes, so those will be the ones that are elongated. This mascara is great to pair with a cat-eye liner to really finish off the total look. Try

Maybelline Lots of Lashes

 or

Lorac Pro Mascara

Curved Wand- Fanned Out Curl

Curved wands are designed to fan out the lashes from the inner corner all the way to the outer corner. The wand shape mimics the curve of the eye, so the wand is the same distance from the eye all the way across. This gives more curl to the lashes located at the two corners of your eye. Try Cover Girl

Flamed Up Mega Curl

 or

Dior Over Curl

Balled Tip- Detailed Corners

The balled tip is a favorite of mine because it allows you get very near the root at the corners to thoroughly coat the base of the lashes, without the risk of poking yourself with a sharp point. You can also turn the wand vertically and sweep the ball end across the lower lashes with lots of precision. You can use the ball tip to direct the outer corners as well, so you have the exact shape you are looking for. Try

Rimmel Scandaleyes Show Off

or

ELF 3-in-1 Mascara

Micro Wand- Tinted & Natural

The micro wand is again a huge favorite of mine because I love the simplicity of it and the natural looking results it gives. Great for your 'no-makeup' days, a micro wand will deliver a dark pigment to your lashes but won't build volume or much length. I also love that a micro wand can get all the way down to the root of your lashes (without poking your eyeball) which is so helpful if you have naturally light eye lashes like blondes and redheads often do. Oh, and it's a dream on those lower lashes too! Try

IT Cosmetics Tight Line Primer

or

Maybelline Lash Discovery

Rubber Shorty- Defined Length

If length is your primary focus, a short bristled rubber wand is the right pick for you. The formula is most evenly applied with this type of brush so you'll have less clumps and be able to build up a longer length with more coats. The short bristles also work as a comb of sorts, keeping lashes extended straight, aiding in the length yet again. Try

Wet n Wild Mega Length

or

Covergirl Lash Blast Length

Flat Comb- Separated & Dark

Definition is the name of the game with lash combs, so if you love to see a separation between every lash then this wand is the one you need. The comb pushes through the lashes and forces each one into a designated path way in the comb. The result is a very uniform lineup of lashes that are equally spaced from one another and coated in lots of pigment. Try

Napoleon Perdis MesmerEyes

or

Mirenesse Cougar Mascara 

Thanks so much for stopping by today, I hope you found this guide to mascara wands helpful! If you want to win a HUGE goody bag of my fav mascaras for yourself, be sure you enter the giveaway down below using the rafflecopter entry. The first two entries are mandatory to play, and the rest are optional but additional entries into the running. Good luck! And check out my cute dress from

White Plum

today, it's only $39 and I LOVE it! 

Follow on Bloglovin

!function(d,s,id){var e, p = /^http:/.test(d.location) ? 'http' : 'https';if(!d.getElementById(id)) {e = d.createElement(s);e.id = id;e.src = p + '://' + 'widgets.rewardstyle.com' + '/js/shopthepost.js';d.body.appendChild(e);}if(typeof window.__stp === 'object') if(d.readyState === 'complete') {window.__stp.init();}}(document, 'script', 'shopthepost-script');

JavaScript is currently disabled in this browser. Reactivate it to view this content.

a Rafflecopter giveaway

THE BEST BEAUTY FROM BACKSTAGE AT NYFW

hair, makeup, nails, NYFW, New York Fashion Week Beauty

Happy Monday! Today I am excited to share with you my backstage coverage from New York Fashion Week. It was such a thrill to be backstage at a handful of shows this year- the energy and excitement is like nothing I have felt before.

Imagine

15 gorgeous models, 30 makeup artists and hairstylists, and 5 manicurists... all doing their jobs at once,

 plus about 20 members of the press (that's me... 'press' :) trying to photograph and video ALL AT THE SAME TIME! In a tiny backstage area, I might add! It is chaos at its' finest.

In the

video

below, I put together some of the beauty looks that I was able to witness first hand, as well as some of my other favorites from shows I wasn't able to attend this season. It gives you just a glimpse of the beauty you can expect to see trending come Spring 2015. The majority of the designers all opted for sleek/wet hair looks on their models, and mostly natural looking makeup. But, there were of course a few outliers that went for bold lips, crazy nail art, and even pierced eyebrows! Take a look:

Featuring looks from:

I hope you find some beauty inspiration in these looks! I know I did, and I'll be bringing you some '

Inspired By'

posts over the next couple months, where I'll showcase some of my favorite looks, and how I would achieve them at home. Stay tuned for those, and be sure you come back later this week for a recap of what I wore while in NY, and for my

Mascara Wands 101

class with Studio5 TV. xo

Follow on Bloglovin

5 QUICK TIPS FOR PREVENTING A MAKEUP MELTDOWN

combat makeup meltdown, makeup tips for humidity

I'll never forget the time I vacationed to Palm Springs one summer just after high school, in early June. It was my first time to that part of California, and I quickly learned that

'I wasn't in Kansas anymore'  

when I stepped out of the airport and was met with a wall of heat unlike anything I had ever experienced before!

As I literally felt the makeup melting off of my face I thought two things: 1) remind me to never visit Palm Springs during the summer months again, and 2) there has to be a better way to apply makeup when it's hot.

A decade later, I still haven't been back to Palm Springs later in the year than April- and I still change my routine in the warmer months to prevent makeup landslides.

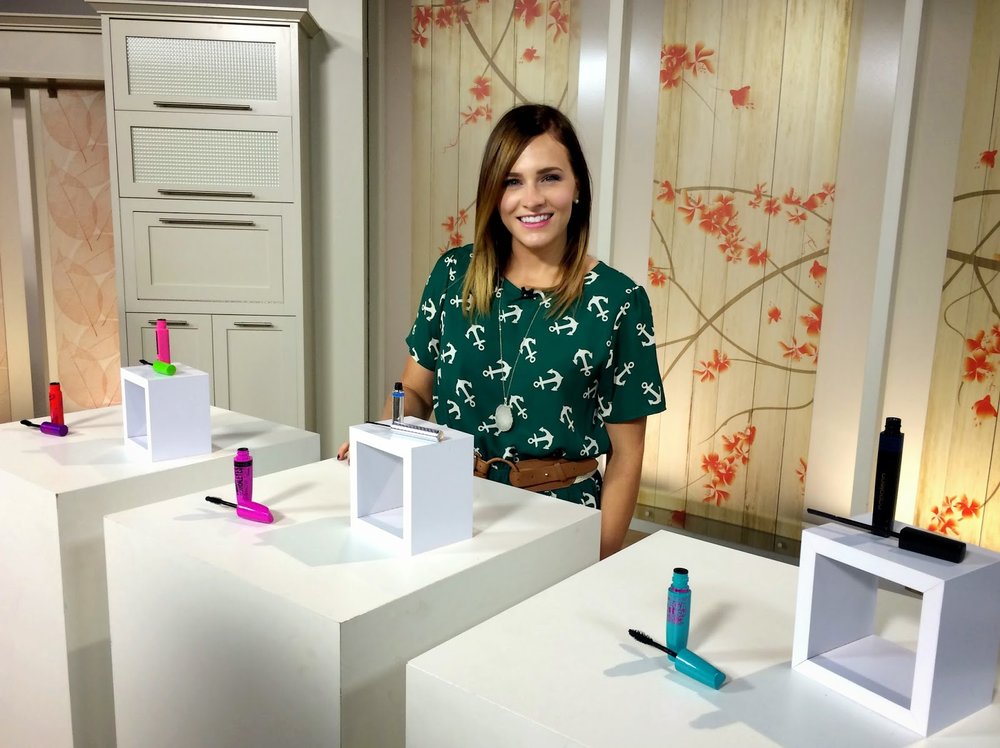
Here are five quick tips that you can use to help your makeup hold up during the hottest months of the year. 

1- Exfoliate in the PM

I honestly learned this technique on a fluke. I am a pretty regular exfoliator, but sometimes I get lazy in the summer usually because I am staying up much later, then I fall into bed without going through my whole skincare routine. After a couple weeks of skipping the scrub step, I realized that my makeup was breaking down much more quickly than usual and I was looking greasy by 4pm.

The culprit? Clogged pores and dead skin cells. My skin wasn't able to breath- causing major oil buildup on my face. That led to a break down of the makeup with a reckless abandon. As soon as I added the scrub back into my nightly (2 times per week) routine, my makeup adhered to my skin better and resisted the elements of heat and humidity much better. Now, I never miss this step and I hope you won't either!

* If you are wondering why I specified NIGHT time scrubbing? Because scrubbing can cause redness, so give your skin a whole 8 hours to calm and repair before applying makeup. Try

Beautisol Exscrub Me?

2- Switch to a gel moisturizer

Cream moisturizers often leave a sheen on the skin that doesn't absorb into the skin for many hours. That glossy finish, although radiant, won't do you any favors when combating humidity, heat and sweat. A gel moisturizer will absorb into the skin much quicker and is light and refreshing with a matte finish. My current favorite is

Garnier Moisture Rescue for Dry Skin

3- Wait 10 minutes post moisturizer before applying anything else

After reading #2 above this step should be a no brainer, but here is the expanded version: apply your gel moisturizer to a clean face in the AM. Then give your face a solid 10 minutes to absorb the gel fully. This is a great time to work on your hair, check your

social

feeds (which hopefully include yours truly! #shamelessplug) or get dressed. Finally, continue with your makeup application.

4- Set first with spray

Once you've completed your beautiful face canvas, set your masterpiece with a makeup setting spray. I love

NYX Matte Finish

in the Summer months (I choose their Dewey finish in the winter) because it works great and is totally affordable. Think of this step as hairspray for your face. Neat-O

5- Set second with powder

And finally hit your T-zone with an extra dose of translucent powder for major oil control and staying power. You can also reapply midday for bonus power, if needed. My go to?

Urban Decay De-slick Mattifying Powder

Hope these tips help you stay fresh all day long. Got any meltdown tips of your own? Let me know in the comments below, xo And don't forget to enter my huge Summer Beauty Box giveaway

here

!

Follow on Bloglovin

!function(d,s,id){var e, p = /^http:/.test(d.location) ? 'http' : 'https';if(!d.getElementById(id)) {e = d.createElement(s);e.id = id;e.src = p + '://' + 'widgets.rewardstyle.com' + '/js/shopthepost.js';d.body.appendChild(e);}if(typeof window.__stp === 'object') if(d.readyState === 'complete') {window.__stp.init();}}(document, 'script', 'shopthepost-script');

JavaScript is currently disabled in this browser. Reactivate it to view this content.

INSIDER STYLIST SECRETS: MAKE YOUR HAIR COLOR LAST LONGER AND FADE LESS

Stylist Secrets: rules to preserve your hair color vibrancy

Hey there! Nice to see you 'round these parts. [yup, that was my inner cowgirl talking]

Have you ever had a color on your hair that was glossy and beautifully pigmented, only to have it fade into a brassy, mousy version of it's former self? It happens to the best of us, so don't feel bad- but

there are 4 steps you can take to keep your hair color vibrant longer. And today, I am stopping by Studio5 to dish on my 4 step process and the stylist secrets you've been looking for.

*** Disclaimer. ALL HAIR COLOR FADES! Even natural pigments fade in the right conditions... remember how your child hood hair turned two shades lighter in the Summer months? Yup, that's fading. These steps will slow down the speed at which your color fades, but you'll still need to keep up on your color services on the regular. Ok, let's get started!

1- The first three washes are crucial!

Resist washing your locks for at least 2 days post color job to allow the color to fully oxidize and set into the cuticle (outer shingle-like layer of the hair) Then, for your first 3 shampoos, use the coldest water you can stand without giving yourself a headache. This means you should wash your hair at a different time than your shower. I prefer to bend forward over the edge of the tub and wash under the faucet, but a kitchen sink works too. The cold water closes down the cuticle layer trapping the color molecules inside. Hot water opens the cuticles so pigment can escape- which means cool water is ALWAYS better for color treated hair, but is essential in the early stages of color protection.

2- Soft water = soft hair

The minerals in our water are not hair and skin friendly. Just ask anyone who has eczema and they'll tell you what a problem hard water is when it comes to drying out the skin. If you don't have a built in water softener on your water heater, you can add a filter right to your shower. The T3 Source Shower Head

uses tourmaline, charcoal and other precious medals to remove 95% of the Chlorine in your water. Your skin and hair will be softer then ever before, and your hair will retain those precious color molecules much longer with this god-sent gizmo.

3- Gentle color safe shampoos are required. period

Shampoos are essentially soaps designed to cleanse the hair of oils and buildup, but if you're not careful they can also 'cleanse' the hair of color molecules too. Using a gentle sulfate free formula is the most important step in this series. And yes, higher end products are the best option because they contain more of the ingredients designed to prevent fading. For example, Pureology Strength Cure uses the plant oils found in sunflower seeds that give a natural sunscreen to the plant [and in turn, your hair] A drugstore brand may also use this oil but usually in lesser amounts, say 10% versus 30% in the salon brand option. So both will help, but the Pureology option may help more. That being said, ANY color safe option is better than nothing... so spend what you feel comfortable with as long as it is sulfate free.

4- UV protection isn't just for your skin

Everyone knows the importance of sunscreen for your skin, but don't miss your hair when you are getting sun-ready every day. Adding a UV protection spray into your hair routine will guard against fading due to the environment. This is essential if you spend time outdoors, and if you were prone to sun-bleaching as a child, you're still prone to it as an adult. Living Proof Instant Protection spray gives a weightless coating of UV protectant to your locks for 24hours, and as a bonus it also protects your hair from heat styling tools up to 450F degrees.

Thanks so much for stopping by today, I hope you got a few new ideas for protecting your hair color. Be sure you sign up to get these posts delivered right to your inbox, using the email signup bar on the top right side of the blog. xo

Follow on Bloglovin

!function(d,s,id){var e, p = /^http:/.test(d.location) ? 'http' : 'https';if(!d.getElementById(id)) {e = d.createElement(s);e.id = id;e.src = p + '://' + 'widgets.rewardstyle.com' + '/js/shopthepost.js';d.body.appendChild(e);}if(typeof window.__stp === 'object') if(d.readyState === 'complete') {window.__stp.init();}}(document, 'script', 'shopthepost-script');

JavaScript is currently disabled in this browser. Reactivate it to view this content.